Manually upload files#
Manually upload files and archives to EclecticIQ Intelligence Center.
You can upload data files and compressed archives on the fly.
EclecticIQ Intelligence Center ingests and processes uploaded data, and it creates new entities after de-duplicating and normalizing it.
Requirements#
The maximum file size you can manually upload is 100 MB.
You can modify this value in platform_settings.py.
Start importing data#
To manually upload files or archives to EclecticIQ Intelligence Center:
In the left navigation bar:
Select Search
 > GO TO SEARCH AND BROWSE > Files.
Select + Upload in the top left.
Or,
In the left navigation bar, select + Create >
 Upload
This brings up the Upload and import data modal. From here, select one of the available Import types.
Import types#
At the Upload and import data modal, select one of the following import types by selecting the Upload > button for that type:
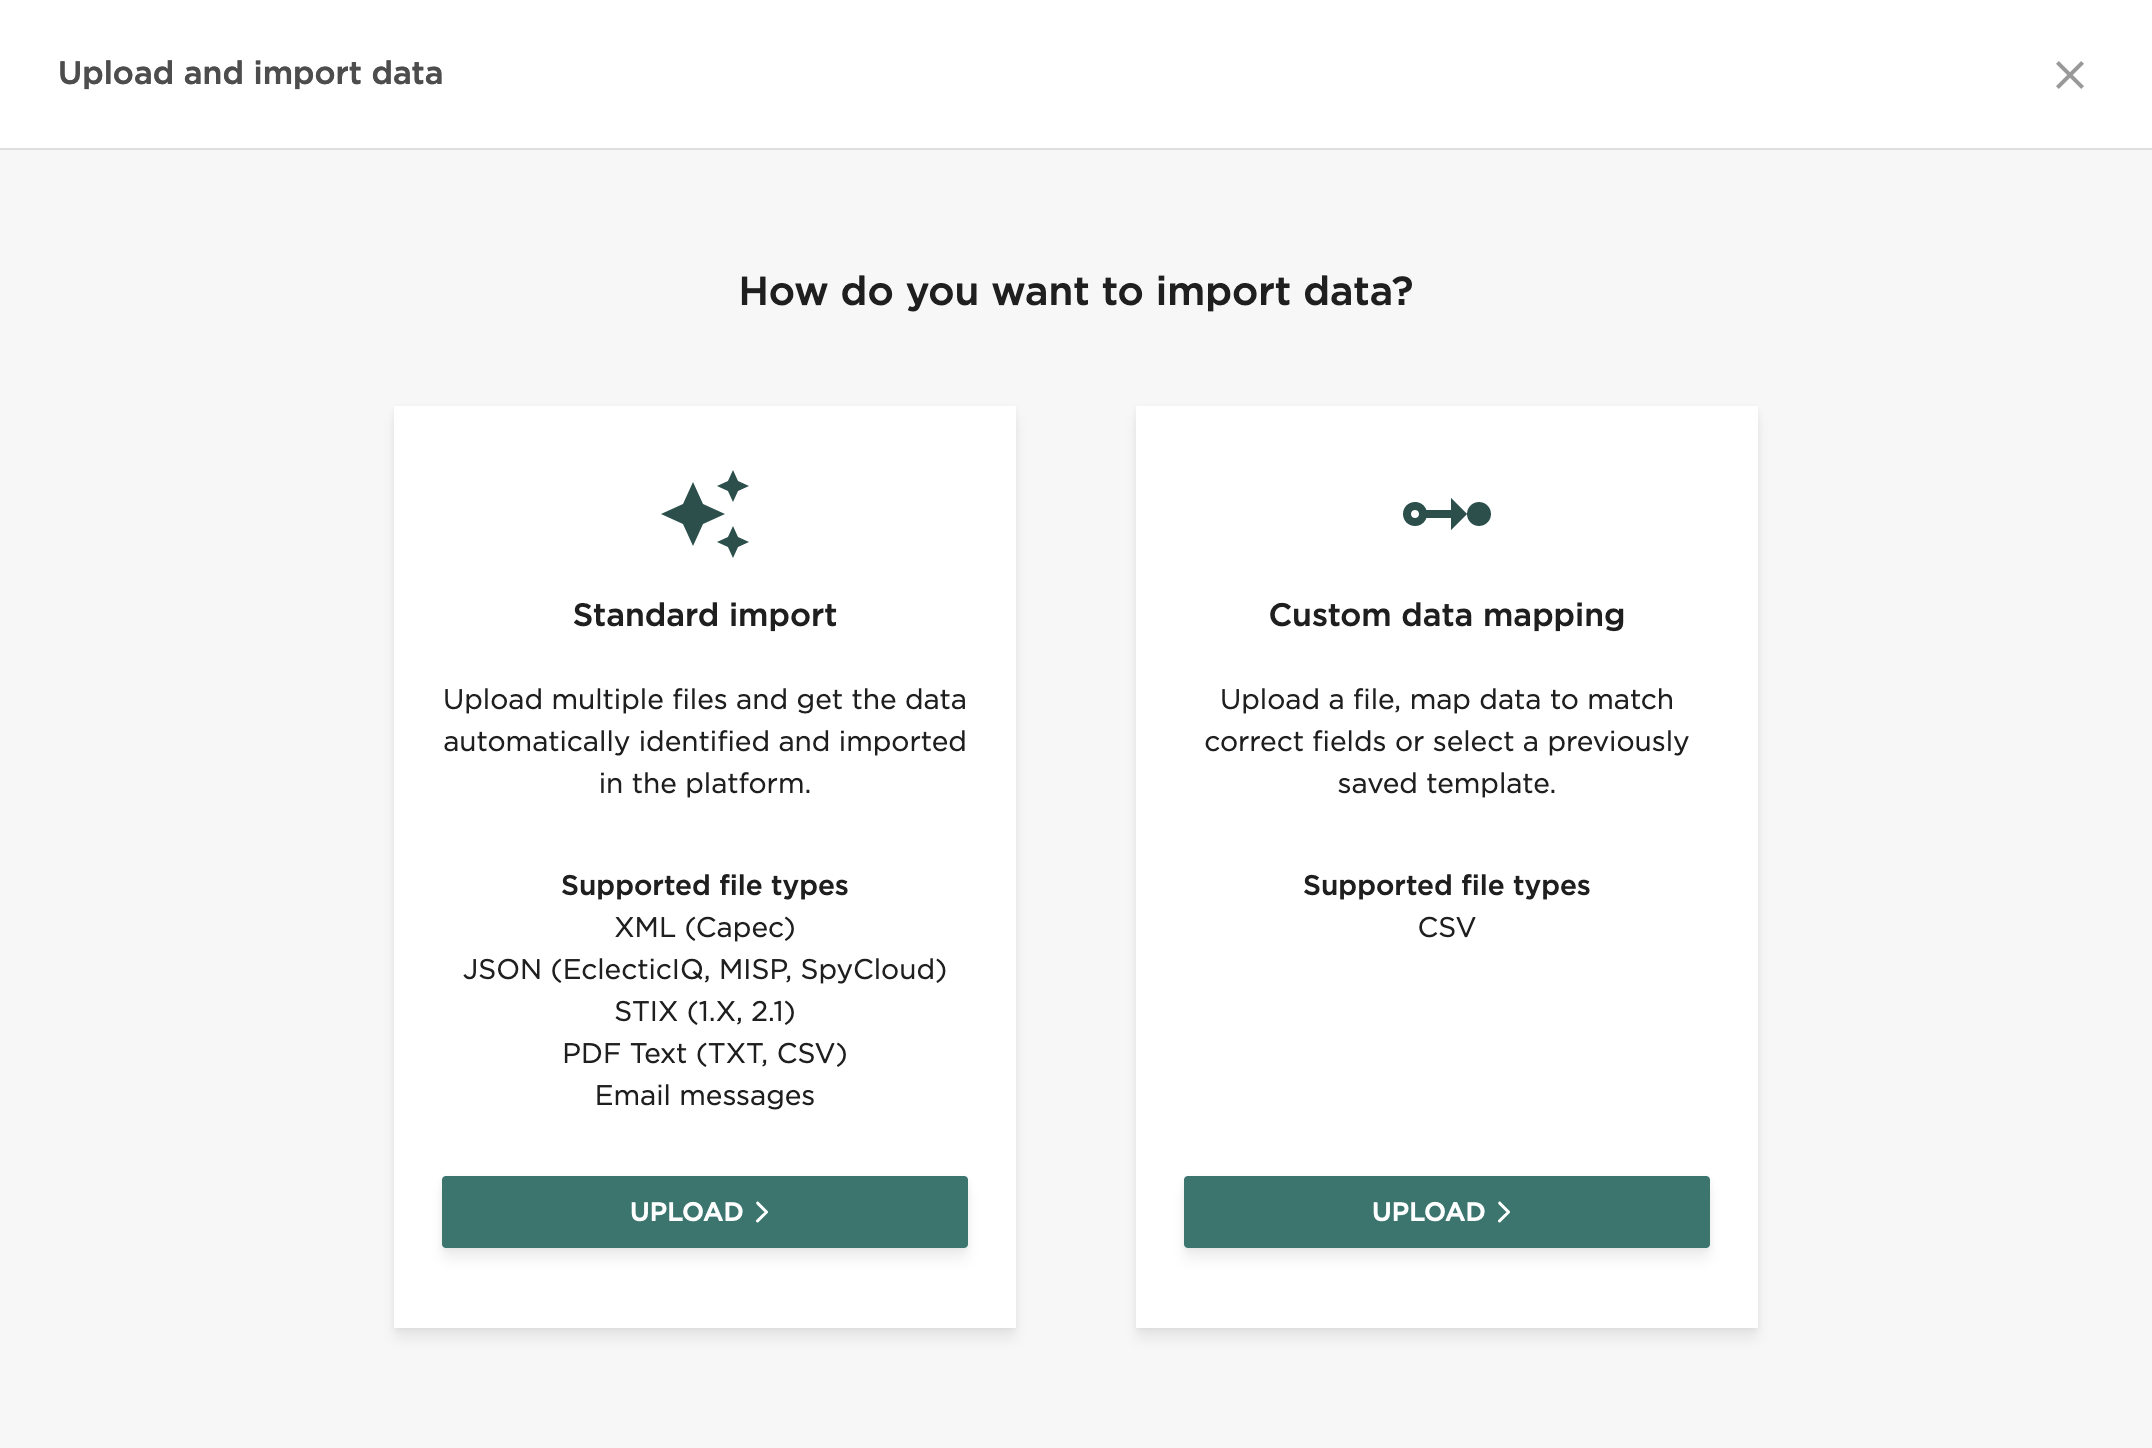
Standard import#
Tip
For a list of supported content types that Standard import supports, see Content types.
In the Upload files modal:
Select the upload icon
in
the pop-up to browse your network for files/archives, or drag and
drop files into the modal.Tip
To delete a file from the list of uploaded files, select the X to the right of its name.
Select a content type for each file you’re uploading.
You can also upload archives containing multiple files of a single content type. See Upload archives.
In the Source field, select a group. All entities and observables ingested from these uploaded files will have this group assigned as their source.
Select the following options if they apply to your upload(s):
Option
Description
Override source reliability:
Set a source reliability for all incoming objects.
Skip extraction of observables from unstructured text:
Password protected archive:
Allows you to provide one password for password protected archives.
If you have multiple password protected archives with different passwords, upload them separately using this option.
Add information source details:
Override TLP:
Override TLP values for all incoming objects.
Select Upload to start uploading these files.
Custom data mapping#
Currently supports:
CSV files.
Upload only 1 CSV file at a time.
In the Upload files modal:
Select the upload icon
in
the pop-up to browse your network for files/archives, or drag and
drop files into the modal.Tip
To delete a file from the list of uploaded files, select the X to the right of its name.
In the Source field, select a group. All entities and observables ingested from these uploaded files will have this group assigned as their source.
Select the following options if they apply to your upload(s):
Option
Description
Override source reliability:
Set a source reliability for all incoming objects.
Skip extraction of observables from unstructured text:
Password protected archive:
Allows you to provide one password for password protected archives.
If you have multiple password protected archives with different passwords, upload them separately using this option.
Add information source details:
Override TLP:
Override TLP values for all incoming objects.
In the Data mapping*, either:
Select a saved Data mapping template. See Data mapping templates.
Then select Start import from the bottom right to start importing this CSV file.
OR
Select Custom mapping to create a custom CSV mapping in the next step.
Select Continue from the bottom right to start creating a custom mapping for this file import.
Create custom mapping with CSV upload#
When you select Custom mapping when using the Custom data mapping tool, selecting Continue brings you to a set of configuration pages where you can define a custom mapping for your uploaded CSV file.
In the Parameters section, set these options:
Delimiter
Default: Comma (
,) Select a delimiter character for this mapping.Quote character
Default:
"Set a quote character (max. 1 character). Text enclosed by this character is interpreted as belonging to a single field.
Parse tags
Select to allow parsing multiple tags from a single
entity.tagsfield.Ignore lines that start with #
Select to ignore comment-like lines in file (i.e. line starts with
#).First row doesn’t contain header names
By default, the first row of a CSV file is interpreted as a row of headings/column names.
Select to interpret the first row as data.
Select Continue.
Here, the Custom data mapping tool detects CSV header names and provides a preview of the contents of each field.
Set the Matching field in EclecticIQ for each field to map it.
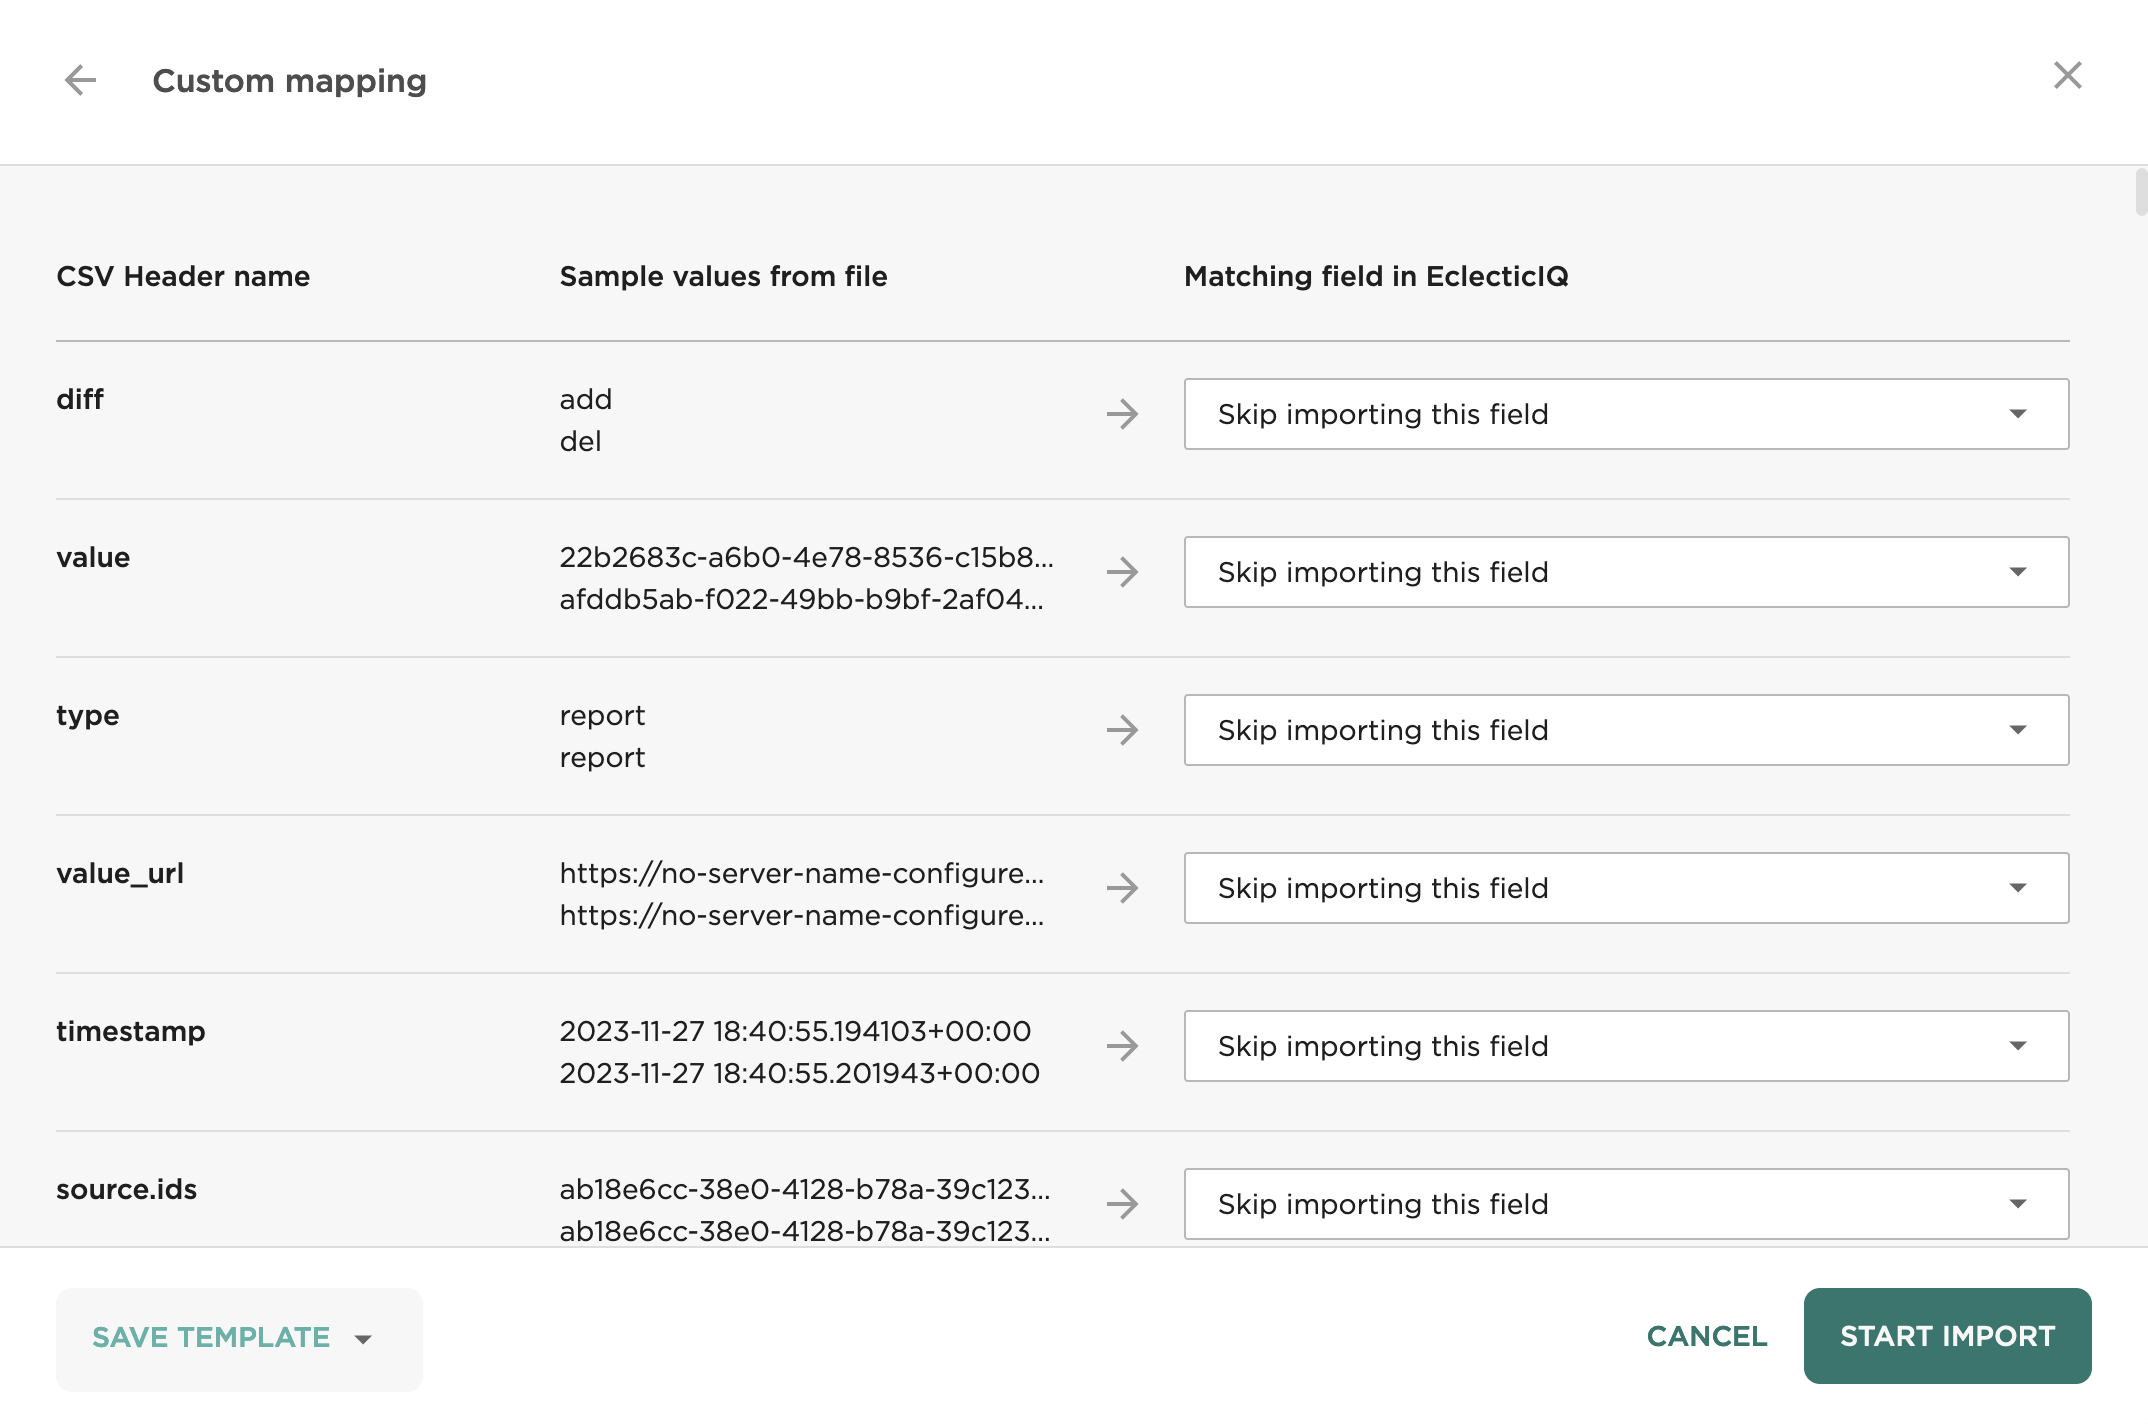
(Optional) Select Save template to save this mapping.
Select Start import to start importing your CSV file.
Appendix#
Content types#
You can upload files in the following formats:
Content type |
Description |
|---|---|
CAPEC XML |
Categorized and enumerated attack patterns, attack mechanisms, strategies, tactics and techniques retrieved from the CAPEC catalog. |
EclecticIQ JSON |
JSON format representing entity data as JSON objects. |
Email message |
Plain text emails.
Uploaded emails must be in the MIME formats:
|
MISP JSON |
For more information, see Incoming feed - MISP. |
Standard PDF format, preferably native (not scanned). |
|
SpyCloud Breach Data JSON |
For more information, see Incoming feed - SpyCloud Watchlist Ingest. |
STIX 1.0 |
STIX data model v. 1.0. |
STIX 1.1 |
STIX data model v. 1.1. |
STIX 1.1.1 |
STIX data model v. 1.1.1. |
STIX 1.2 |
STIX data model v. 1.2. |
Text/Plain text value |
Plain text format. This content type enables entering free text and literals, wildcards (where supported), as well as JSON paths to point to specific entity property fields, and regex patterns to filter data. |
Add information source details#
Select this to override the Source field of all incoming objects.
When selected, configure these fields:
Field |
Description |
|---|---|
Description |
Source description. |
Identity |
Name of source. |
Roles |
Select at least one of the following roles:
|
References |
Set one or more URLs. |
Upload archives#
You can upload archives using Standard import. Uploaded archives must:
Contain only files of the same content type.
You can only set one content type per uploaded archive, and that content type is applied to all files in the archive.
Be one of these file types:
rar,tar,tar.bz2,tar.gz,tar.z,zip